GonnaOrder understands the value of your marketing efforts. We provide you with the chance to connect with your favorite marketing tools so you can monitor the value you get from your efforts. We have support for Google Analytics and Facebook Pixel which you will learn to connect with your store below.
You may want to read the blog on Combining GonnaOrder with Google & Facebook Marketing Tools to better understand how this works and how you benefit.
On This Page
- Add Your Website and Links to Your Social Media Accounts
- Where Your Website and Social Links Are Used in GonnaOrder
- Connect Your Store to Facebook Pixel
- Facebook Domain Verification
- Connect Your Store to Google Analytics
- Connect Your Store to Google Tag Manager
Add Your Website and Links to Your Social Media Accounts
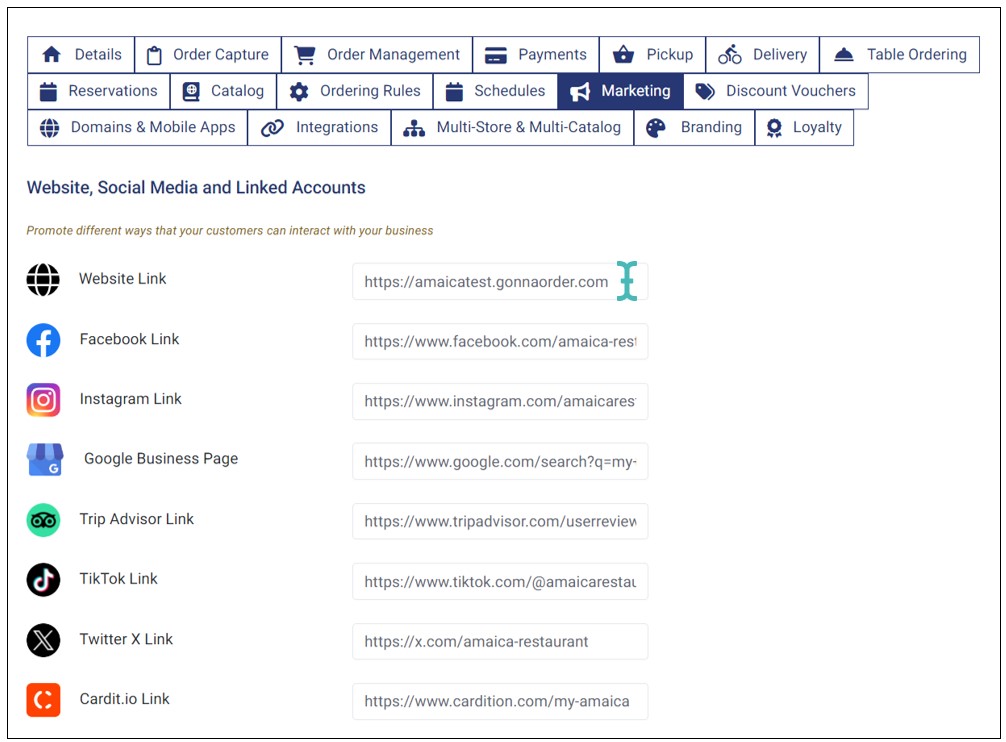
As part of the marketing settings, you can add a link to your website in GonnaOrder. You can also add links to your business page on popular social media accounts to enhance your audience reach and promote brand visibility. GonnaOrder allows you to include links to the following websites and social media accounts for marketing purposes:
Your website link
Facebook link
Instagram link
Google Business Page
Trip Advisor link
TikTok link
Twitter X link
Cardit.io link
To include these links in your GonnaOrder store, go to Settings > Marketing and enter the respective links to you store.
Where Your Website and Social Links Are Used in GonnaOrder
Printed/ Downloaded Order Receipts
Website link
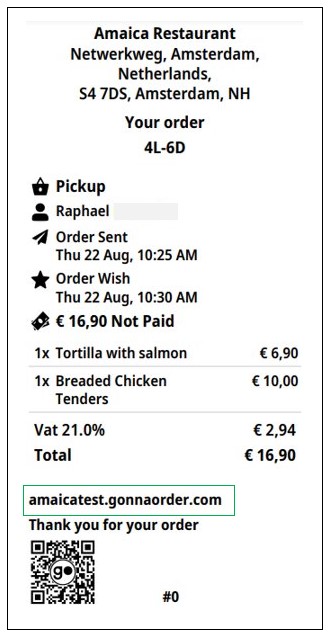
An order receipt is generated for every order placed in your store. For every receipt printed or downloaded from your GonnaOrder dashboard or via the autoprint app, GonnaOrder adds your website link near the footer area.
Your website address is one of the ways that customers can identify your store.
If you have a custom domain name configured in GonnaOrder, your custom website address will replace your GonnaOrder domain on the receipt. This is meant to give you ownership of your store and increase visibility.
Post-Order Thank You Page
GonnaOrder is committed to promoting you as a brand. As part of this commitment, we add your social media links to materials and website sections that might increase exposure to customers.
The post-order thank you page is a strategic website section visible to all customers who successfully submit an order in your store. This page displays social media buttons that are linked to your social media profiles. Therefore, customers can further interact with your business on social media with a single click.
TikTok
X (Formerly Twitter)
Cardit.io
If a customer clicks on a particular social media button, they are redirected to the social platform represented by the button where they can view your profile and interact with your business.
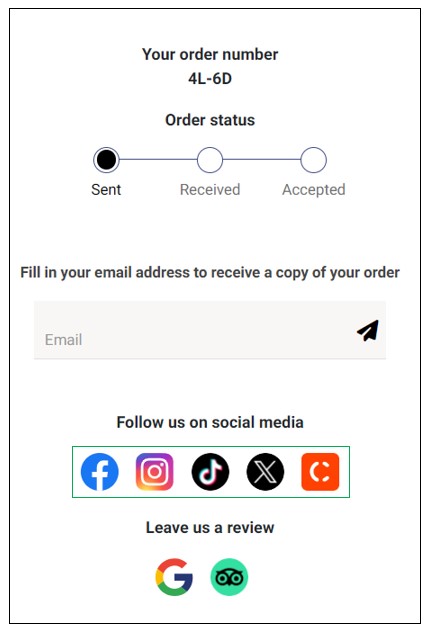
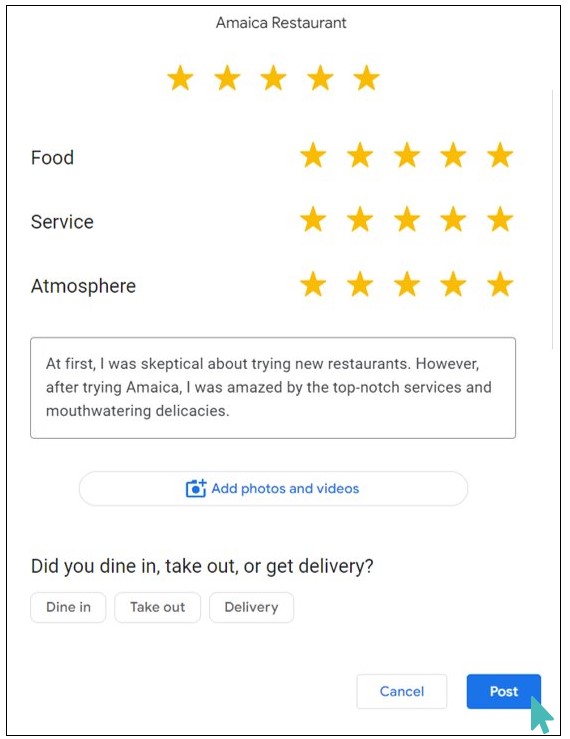
Also, customers can visit your Google Business or Trip Advisor profile and leave a review on the quality of services rendered. This can help grow your brand identity as target audience can read reviews from actual customers and know what it is like to shop or dine at your restaurant.

When a user clicks the Google or Trip Advisor icon, they are redirected to your business profile on the respective platform, where they can leave an unbiased review on the services offered.
Note
The social media, Google, and Trip Advisor icons will only appear on the thank you page only if you have entered the respective links on the marketing settings section.
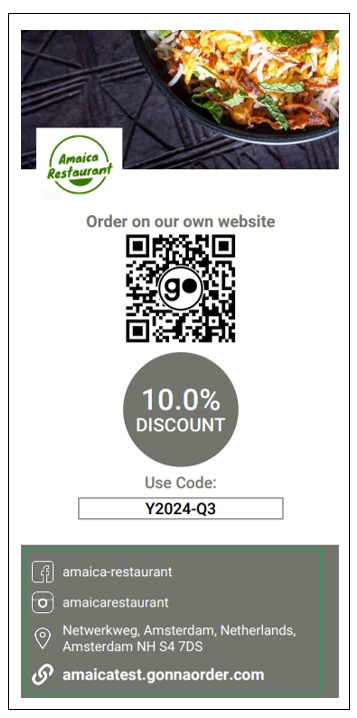
Sharable Store and Discount Voucher Flyers
You can download discount voucher flyers from your GonnaOrder store. The flyers are automatically generated for all vouchers with the status set to active and which have not reached their expiry date.
These flyers are pre-designed and have information relating to your store.
Facebook name
Instagram name
Website link
Connect Your Store to Facebook Pixel
Facebook Pixel lets you learn about how people interact with your store. It provides you with useful measurements to track the performance of your products and the store in general. You can use the data and insights gained from Facebook Pixel to restructure your menu for more conversions.
With GonnaOrder, your Facebook pixel measures four fundamental events:
Page views: a new page view is recorded every time a guest opens your store on a browser or through GonnaOrder/custom app.
Add to cart: Facebook pixel tracks the catalog and item details pages to track when items are added to the cart.
Initiate Checkout: this event is recorded when a customer clicks on the Proceed button after adding items to the cart.
Purchase: a purchase event is recorded when a customer submits an order to your store. Both paid and unpaid orders are recorded.
Generally, the Facebook Pixel is a piece of code that should be inserted in the header section of a website. For GonnaOrder users, the process is simplified, and you do not need to edit any code. You need to have a Facebook business account to continue.
Login to your Facebook Business account and navigate to Events Manager from the menu.
The next section lets you choose the data sources you want to connect to Facebook Pixel. Select the Website option and click Connect to proceed.
Next, create your Facebook Pixel and give it a name. The name could be anything, but using words or phrases relating to your Gonnaorder store name is best. This naming strategy is especially useful if you have multiple pixels connected to different data sources.
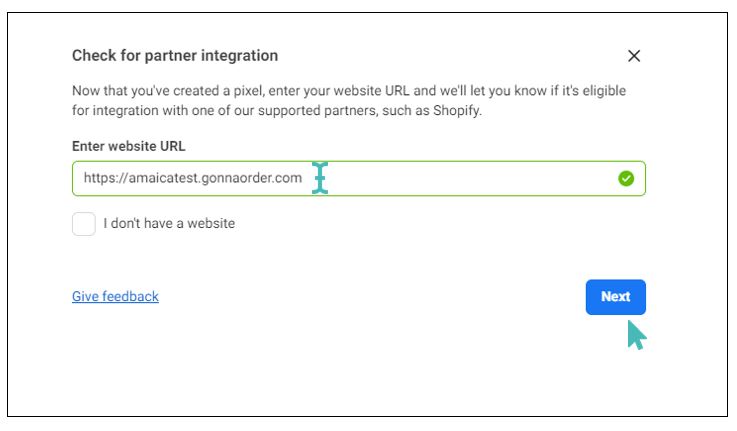
In the next section, enter your Gonnaorder store URL in the website field and click Next to continue.
Facebook provides two alternative methods with which you can connect to Pixel.
Conversions API and Meta pixel
Meta pixel only
GonnaOrder uses the Meta pixel only option, and you should therefore continue by selecting this option.
In the next section, choose to manually add the Meta pixel to your website. This option allows you to copy your pixel code, from which you can then extract the pixel ID.
Click Copy code to get the Facebook pixel base code and proceed. Ignore the second step shown on the pixel section at this point and instead follow the instructions on this page.
On the pixel page, the instructions say that you should paste the base pixel code in the header section of your website. However, GonnaOrder has taken care of that part, and it should not worry you. Instead of that, you will paste the base code into a text editor and extract the pixel ID that you will then add to your store. The pixel ID is a numeric value that you can easily copy from the base code.
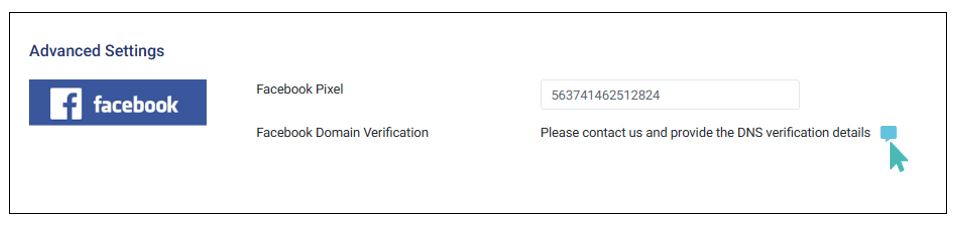
Now, go to your GonnaOrder store dashboard and navigate to Settings >Marketing. Under Advanced settings, paste the pixel code to the respective field. The next steps will help you complete setting up your pixel on your business manager account.
Optionally, you may toggle on your pixel’s Advanced matching setting and select the data points you would like to share. When turned on, your store will send the selected customer information to Facebook, along with the tracked events.
The last step involves adding events to the Facebook pixel through the event setup tool or using code. GonnaOrder has taken care of this step, and you can ignore it and click continue to finalize the setup.
To this length, your Facebook Pixel should start receiving events from your GonnaOrder store. However, notice it may take between 30 minutes and a few hours before the first events appear on your dashboard.
Click Continue and then Go to Pixel Overview to exit the setup.
Facebook Domain Verification
The Facebook domain verification process prevents domain misuse and provides controls on who can edit your published content, including Facebook ads. It ensures that only trusted employees and partners have access to a particular domain.
Recently, Facebook changed the domain verification process so businesses can only verify and claim ownership of top-level domains. This means you cannot directly verify your GonnaOrder store sub-domain. However, you can still request GonnaOrder to facilitate the verification on your behalf.
To get started, log in to your Facebook Business account and open the Domains section under Brand safety and suitability.
In the next steps, you will navigate to the domain settings in your Facebook business manager and obtain the DNS verification text. The text is a single string following this format:
facebook-domain-verification=nwf1p147itwano67u8m1rh7bx8hmxv
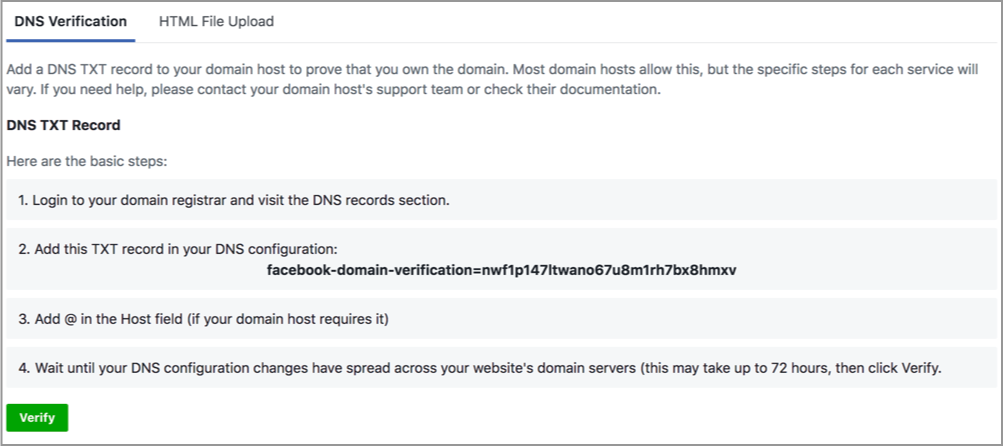
After obtaining your DNS verification text, go to your GonnaOrder marketing settings and click the contact button on the Facebook website verification section. Enter your DNS verification text and submit. Our team will promptly update the DNS configuration for your store and notify you.
Facebook Pixel and Cookies
Facebook Pixel stores additional information on a user’s computer other than what GonnaOrder would otherwise store. The information is collected in accordance with Facebook’s terms of use and cookies policy. For this reason, GonnaOrder will show your users a cookies acceptance card if you connect your Facebook Pixel.
On the cookies policy card, your customers will have three options; Accept cookies (consequently, activate Facebook Pixel), Reject cookies (skip Facebook Pixel and continue), or read more. The read more option allows them to read how GonnaOrder uses cookies to improve their experience. Facebook pixel cookies will only be installed on devices where users accept cookies.
If a user accepts cookies during their first visit to your store, they will be exempted from the cookies notice for the rest of the times they visit your store from the same browser. However, they may see the cookies message again if they delete cookies from their browser.
Connect Your Store to Google Analytics
Connect Your Store to Google Analytics 4 (GA4)
Google Analytics 4 (GA4) is the newest version of Google Analytics tools. It is set to replace universal analytics (UA) starting March 2023, and you are encouraged to switch to the new platform to continue measuring your website or app. In fact, universal analytics will stop processing data on July 1, 2023.
GA4 comes with an improved user interface that is much cleaner and easier to navigate. Google has also upgraded analytics tools, features, and reports.
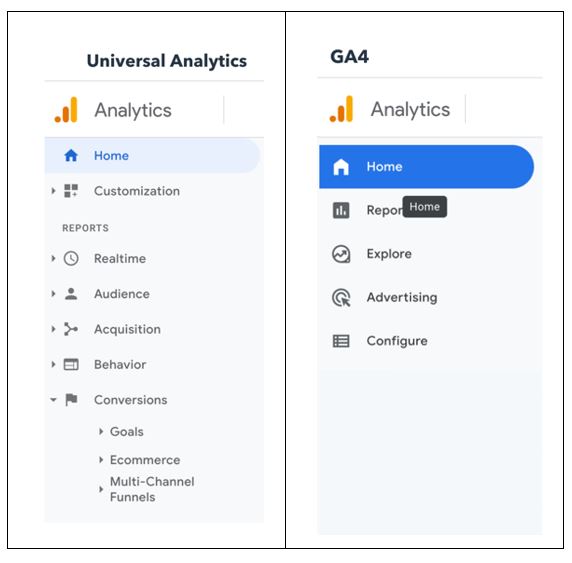
There are two ways to tell if you are already using GA4 for your website:
- GA4 measurement ID uses G-XXXXXXX format that replaces the UA-XXXXXX-Y format used by universal analytics tracking code. You will probably have Google Analytics 4 if you created your analytics account after October 2020.
- The GA4 home page looks different, with fewer menu items
Tip
GonnaOrder will continue supporting both universal analytics and GA4 during the transition period to ensure you are always measuring your store
How To Migrate to Google Analytics 4 With Setup Assistant
Using the Google Analytics 4 Setup assistant is probably the easiest way to migrate from universal analytics to GA4. The setup assistant can help you migrate some of your universal analytics settings and data. The following steps will guide you to migrate to Google Analytics 4 using the setup assistant:
Tip
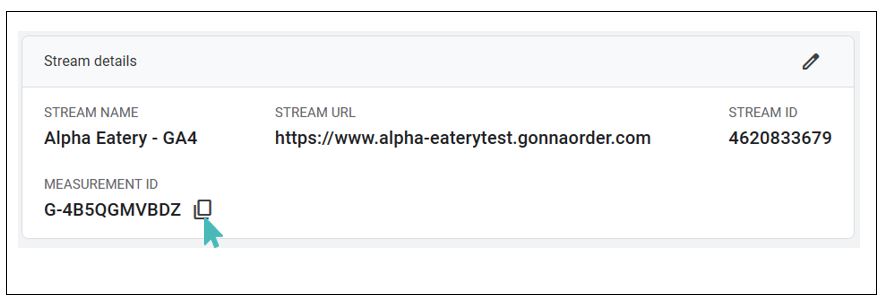
If your analytics account already uses the GA4 property, you only need to copy the measurement ID from the respective data stream to your GonnaOrder store. The steps described here may not apply to you.
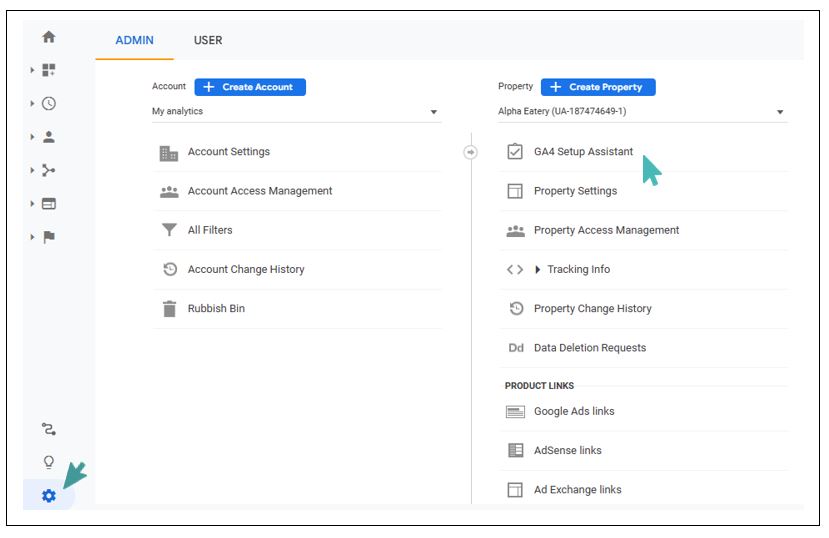
On your Google Analytics dashboard, click on the Admin cog wheel from the bottom left section and select GA4 Setup Assistant from the property column.
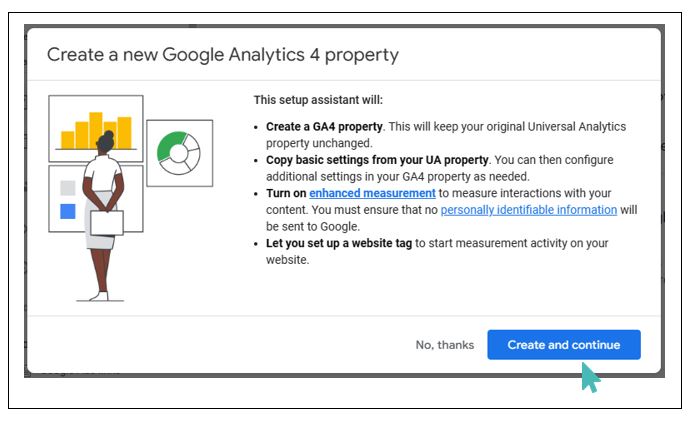
On the setup window, click on the Get Started button to proceed.
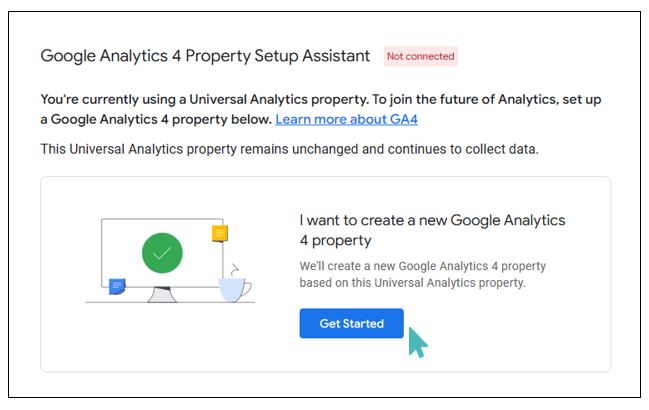
The setup wizard will now show you all the actions that it will do to help with the migration. These include creating a new GA4 property, copying basic settings and data, and activating enhanced measurement. Notice that the customizations you have set for universal analytics will not be automatically copied to your new GA4 property. These can be copied later. When you are ready, click on the Create Property button.
Once setup has finished creating a new GA4 property for you, it will take you to a new page from where you can start configuring your analytics settings. Click on Go to your GA4 property to switch to the newly created property.
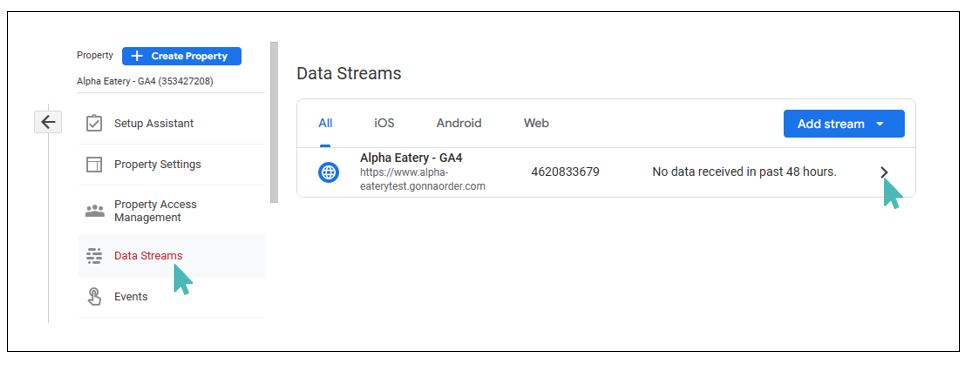
On the GA4 property page, click Data Streams and select the respective property you just set up.
For more information on migrating from universal analytics to GA4, read the Google Support article on adding GA4 property to a site that already has analytics.
Connect Your Store to Universal Analytics (UA)
Google universal analytics (UA) is an older analytics tool that you can use to measure your website or application.
Universal Analytics will only be available to users for a short time as Google has announced they will decommission it in favor of GA4.
As such, we recommend that you connect your store to GA4 to avoid measurement disruptions in the future.
You may also want to read HubSpot’s guide to Google Analytics or the GA4 introduction by Google.
Connect Your Store to Google Tag Manager
Google Tag Manager is a free tool that lets you install and manage marketing tags without adjusting your website code. The marketing tags are code snippets that collect data and track almost any kind of user behavior or event you can think of.
Connecting your GonnaOrder store to Google Tag Manager allows you to track customer actions, such as clicks, purchases, and page views. This helps you analyze customer behavior and interactions with your website. With these insights, you can develop strategies to boost conversion rates and monitor store performance. Additionally, it simplifies the integration of other marketing platforms and tools like Google Ads and Google Analytics.
To connect your store with Google Tag Manager, you need to create you own tag that you will use to integrate with GonnaOrder. Here’s a quick breakdown of the steps involved.
Create Your Google Tag
Here are the steps to follow to create your own google tag.
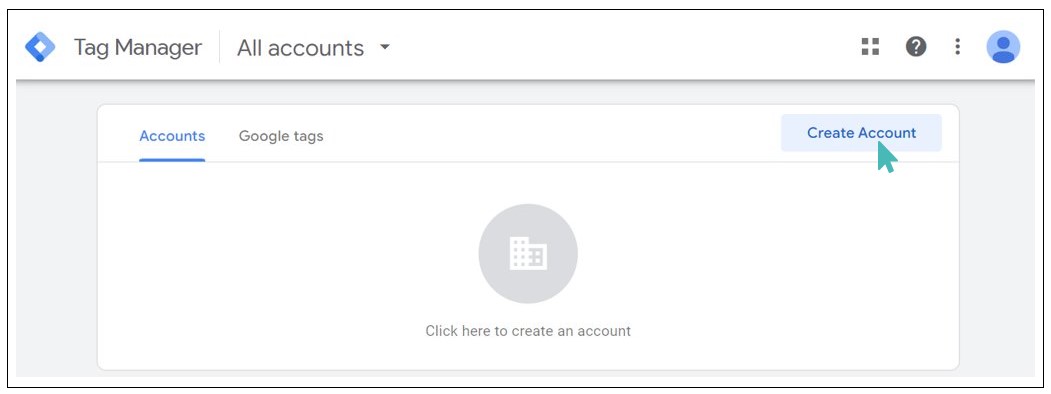
- To create a google tag, sign in to Google Tag Manager using your google account details.
- Go to accounts and click Create Account.
- Enter the following details to complete the process of creating the account:
Account name – e.g., GonnaOrder
Country – e.g., United Kingdom
Container name – e.g., www.gonnaorder.com
Target platform – choose Web
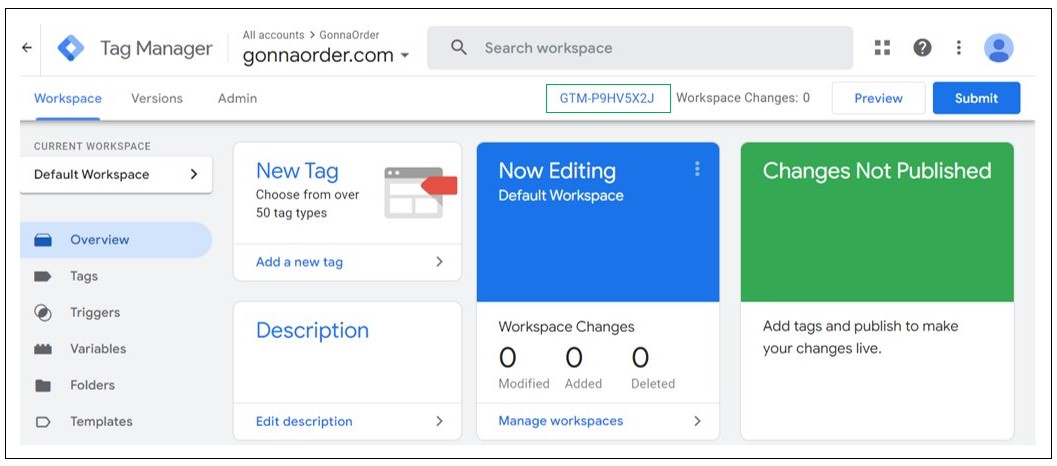
- Finally, click Create and accept the terms and conditions to proceed.
You are redirected to a page with the tag that you can use to integrate your GonnaOrder store with Google Tag Manager. The tag has this structure, GTM-XXXXXX.
Use the Tag to Connect GonnaOrder to Google Tag Manager
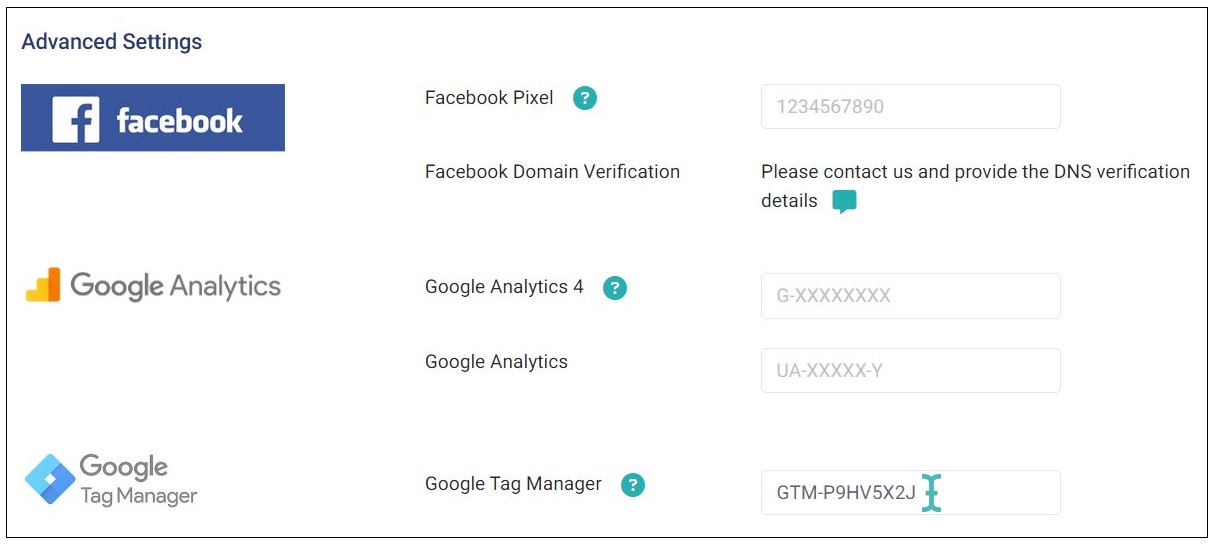
Having created the Google tag, it’s time to connect it to your GonnaOrder store. To do so, go to your GonnaOrder’s admin UI and choose Settings on the left menu.
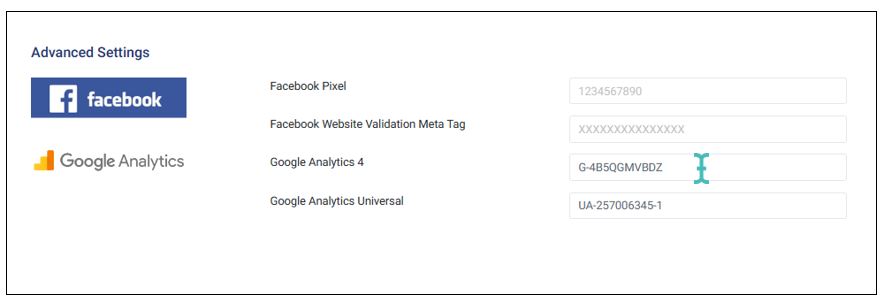
Click Marketing and scroll down to Advanced Settings.
Enter the Google tag you just created on the Google Tag Manager field.
Next, install the Google Tag Assistant Companion extension on your browser.
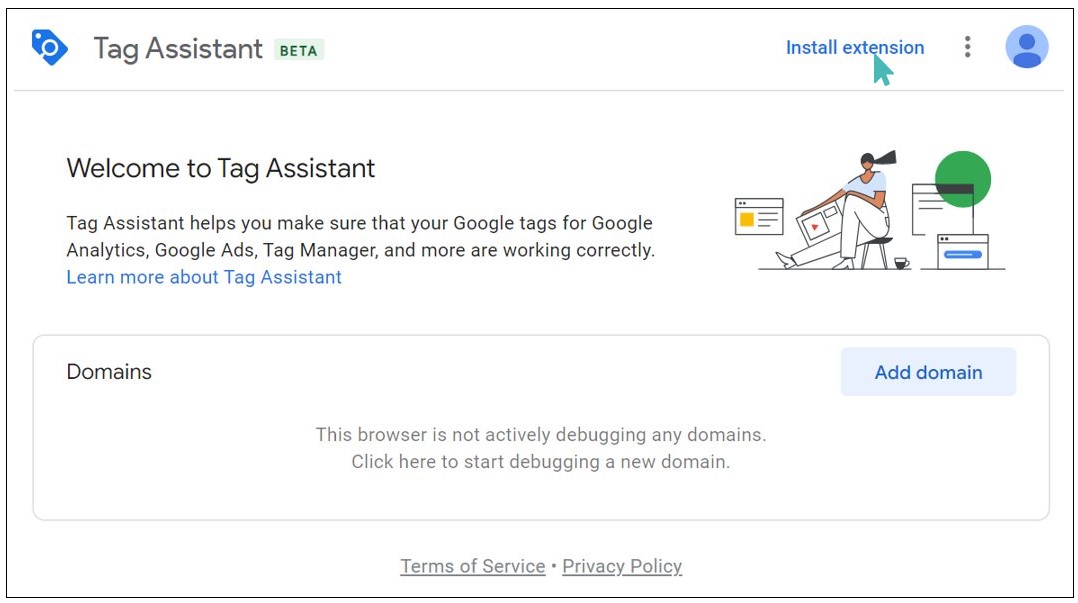
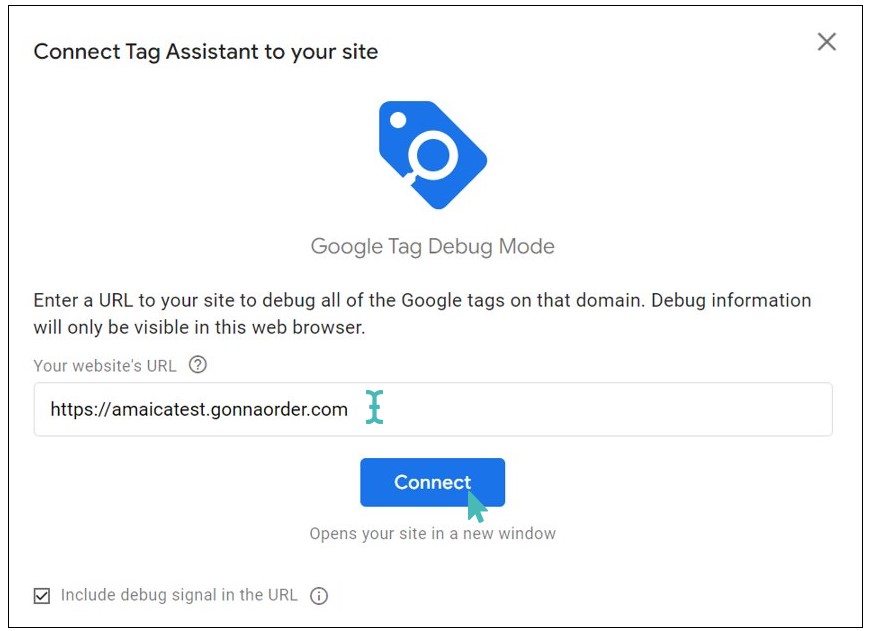
Click the tag assistant companion icon and enter the your store’s URL. Note that you enter the Customer UI’s URL and not the Admin URL.
To find your store’s link, go to Share & Preview on the left menu and copy the URL from there.
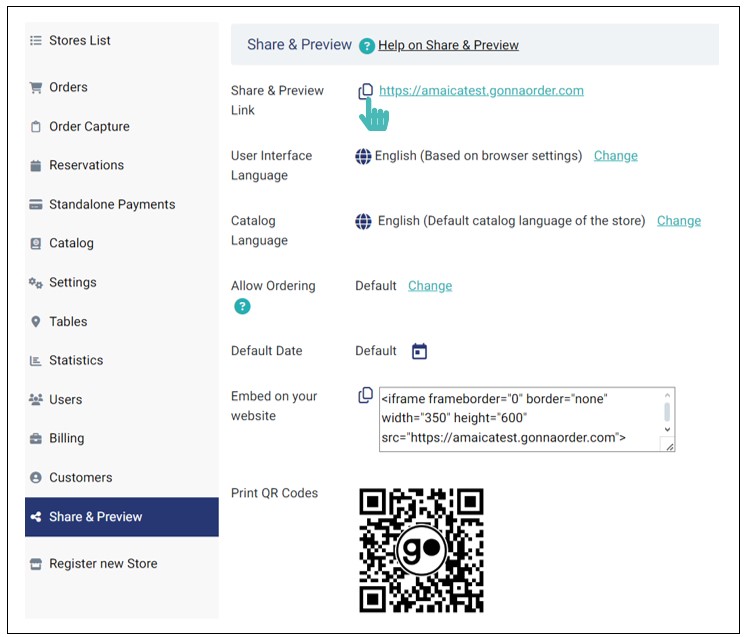
Paste the link you just copied on the tag assistant website URL field and click Connect.
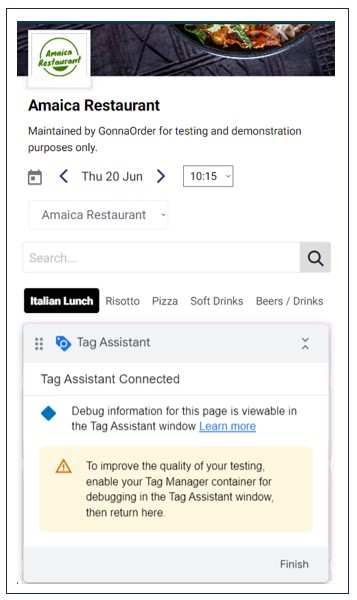
You are redirected to the customer UI in a new tab with a pop-up notification informing you that the connection is successful.
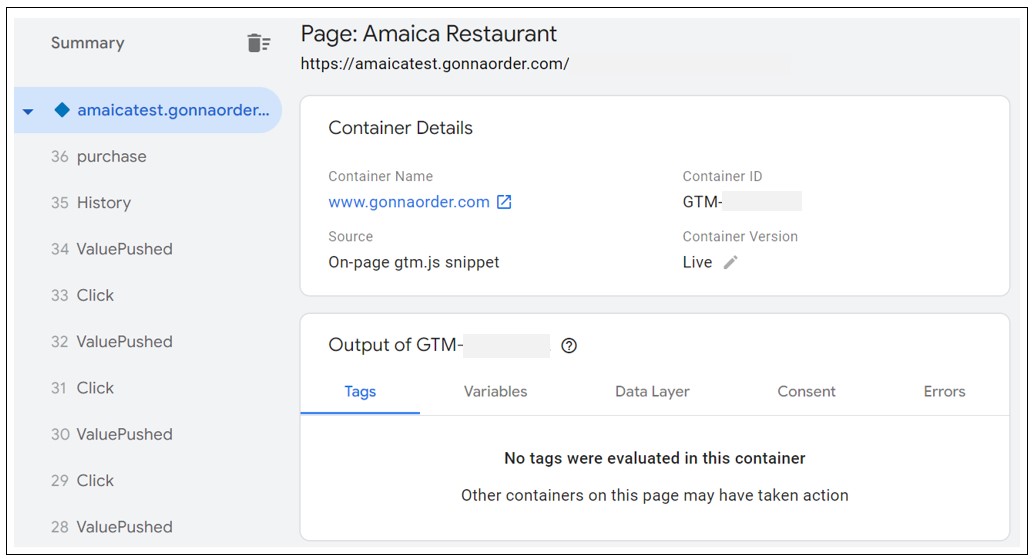
Go back to the tag assistant page (tab) and click Continue on the pop up that appears.
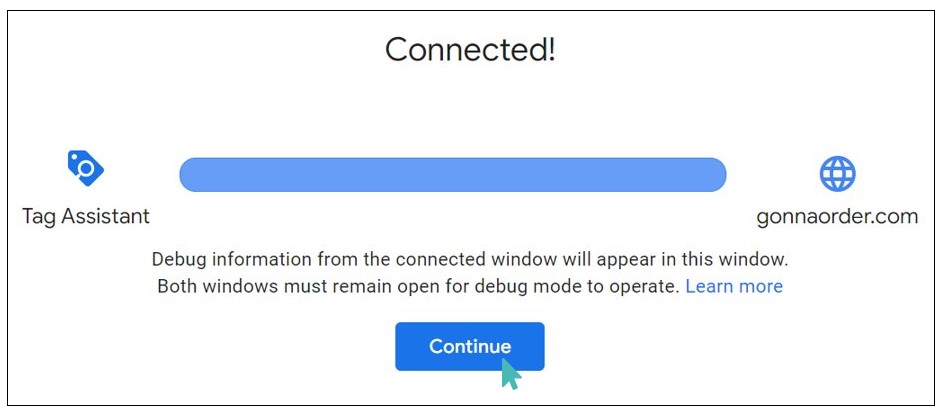
You can now view the summary of actions taken by customers on your site as well as other connection details like container name and ID.