You may need to change the availability status of store items in your store for various reasons. For instance, when you are starting a new store or adding a new category to your menu and you need to make further arrangements before you start selling. In this scenario, you will need to hide the item from the customer menu to avoid having to explain to customers that the item is currently not ready for selling. Similarly, when an item runs out of stock, you may need to update the availability status to inform customers that the item not available for ordering at the moment.
GonnaOrder offers two ways in which you can set or change the availability status of a store item:
- Use the one-click status update settings: Use the combined status update setting to configure the visibility, orderable, and stock setting for an item with a single click. This method is only applicable to main store items. It cannot be used to hide a category, price variant, or options.
- Set item status by updating item details: With this method, you set the visibility, orderable, and stock individually by way of updating the item details. The method can be used for items, categories, price variants, and options.
On This Page
- Mark Items as Available via Status Update Settings
- Mark Items as Out of Stock via Status Update Settings
- Mark Items as Out of Stock through Item Details Update
- Hide Store Items via Status Update Settings
- Hide Items by Updating the Details
- Hiding Categories, Option Groups, and Price Variants
- Set Items as Inactive by Updating the the Details
- Filter Catalog Items by their Availability Status
Mark Items as Available via Status Update Setting
This is the default status of all new store items and old items that remain unchanged. Setting an item’s status to available means it is in stock, Visible, and Orderable. It is equivalent to resetting all other statuses discussed on this page.
Mark Items as Out of Stock via Status Update Settings
This applies when products are temporarily out of stock. Otherwise, it is better to hide or delete items you do not want to sell anymore.
Enable stock management to use this feature
Instead of manually marking items as out of stock, we recommend that you activate the stock management feature. This way, menu items are automatically marked as out-of-stock when the stock level reaches zero. Otherwise, you risk receiving orders for items that are no longer in stock if you do not manually update the item status on time.
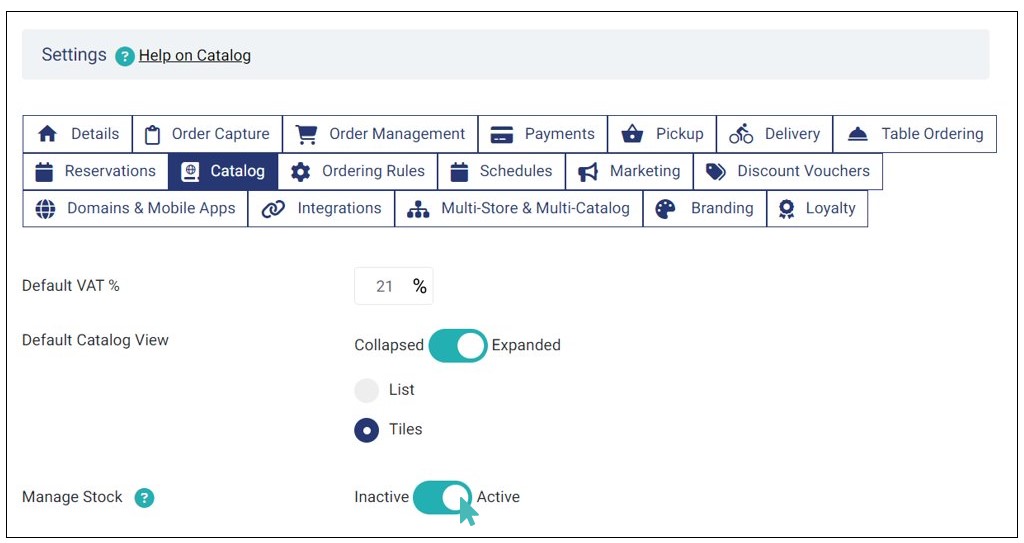
Go to Settings > Catalog and click to toggle the Manage stock button to Active.

To mark an item as out of stock, click Catalog on the side menu and expand the category in which the item is listed. Next, click on the small settings icon to the right of the corresponding item name.
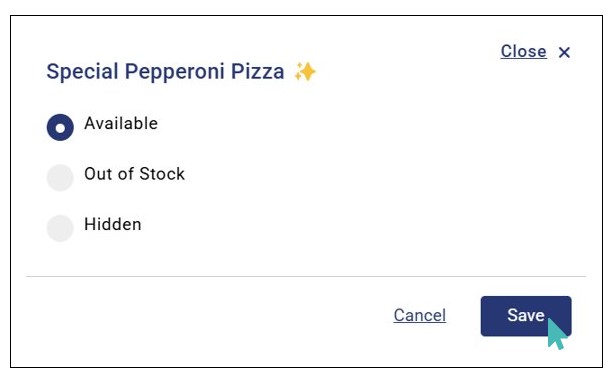
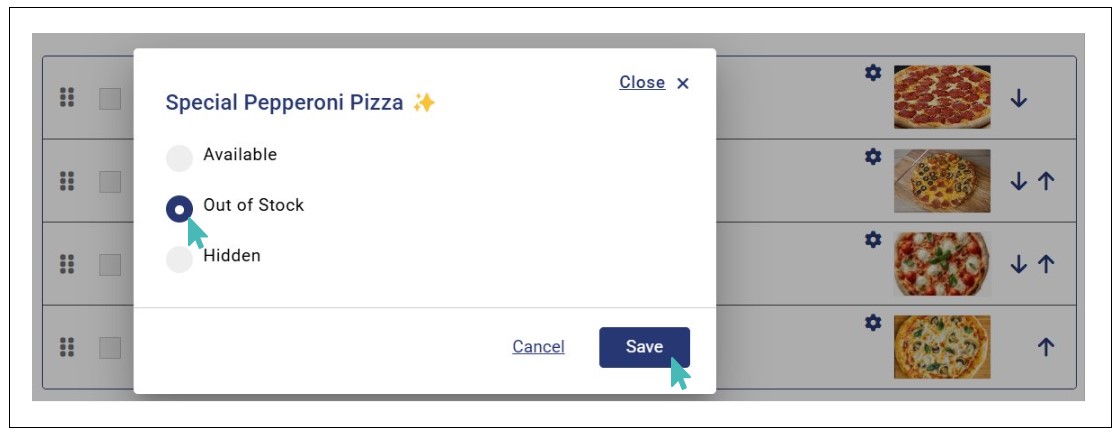
On the options screen that comes up, click on the radio button labeled Out of stock and save the changes to your catalog.
You can also change the status of multiple items in one instance. To change the status to Out of Stock for multiple items, select the checkbox next to each item whose status needs to be changed.
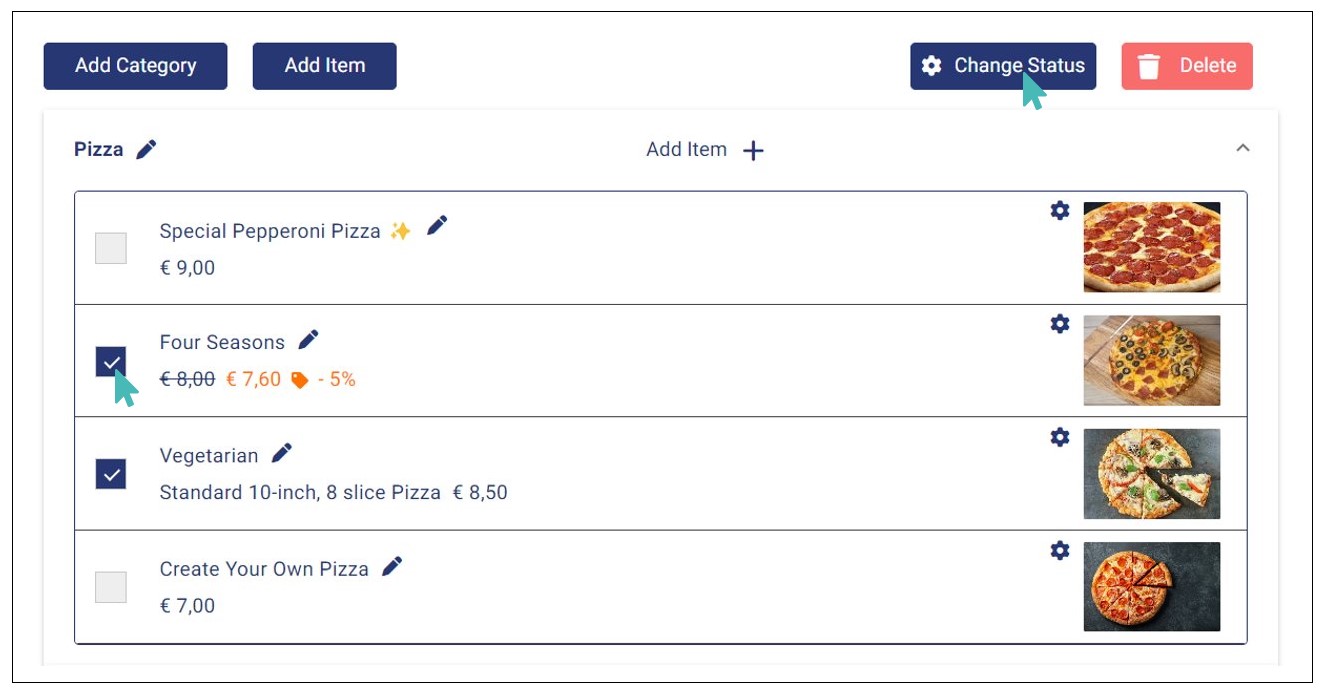
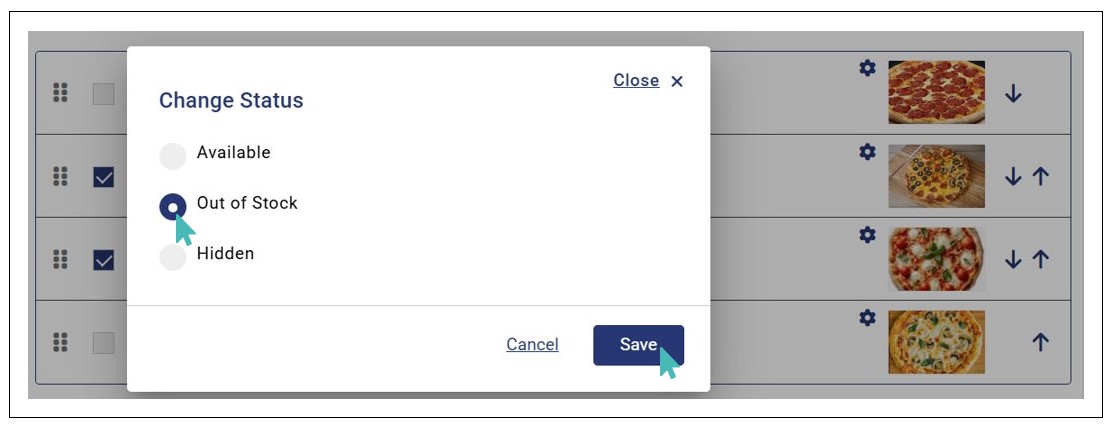
Click Change Status on top right corner of the page. An options window appears. click on the radio button labeled Out of Stock and Click Save to confirm the changes to your catalog.
Tip
You can use the above method to changes statuses of multiple items from across different categories in catalog to Available, Out of Stock, or Hidden.
An item that is out of stock will have a tag Out of Stock next to it on the store catalog. Also, it will be marked with a beige color on the catalog in the admin UI (see the image below). This ensures store administrators and operators can easily notice the item and make any necessary changes.
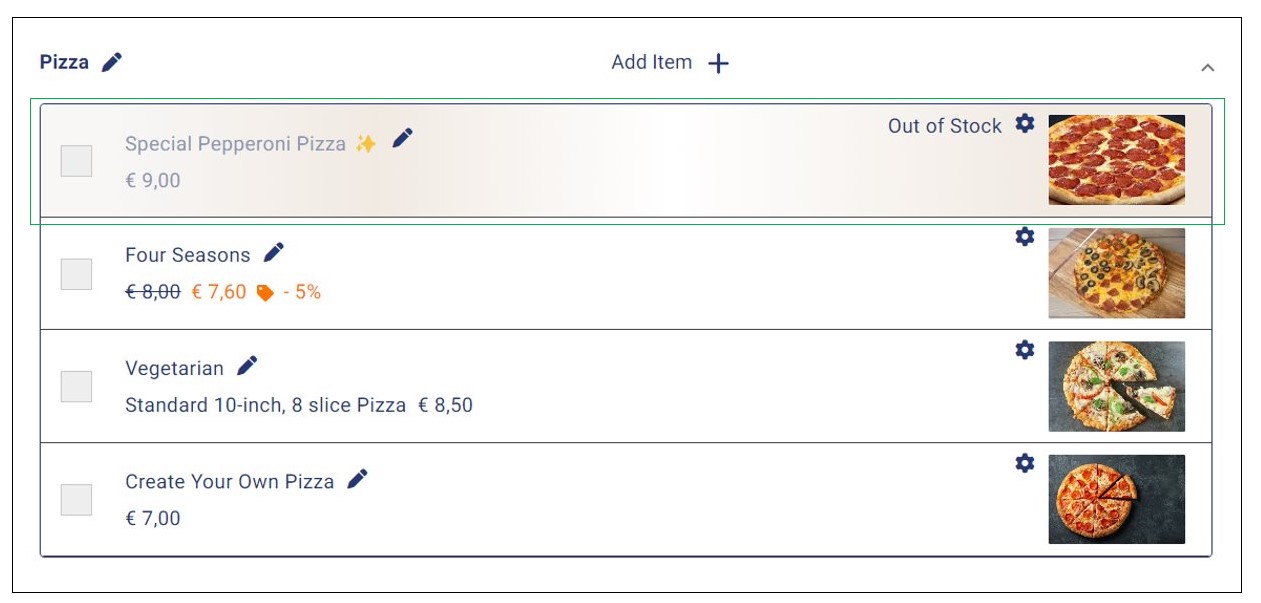
Items marked as out of stock will still appear on the customer menu. However, customers cannot click on them and hence cannot add them to new orders.
Mark Item as Out of Stock Through Item Details Update
For this method, you must first enable stock management. Visit Settings > Catalog and toggle the Manage stock button to Active then proceed as instructed below.
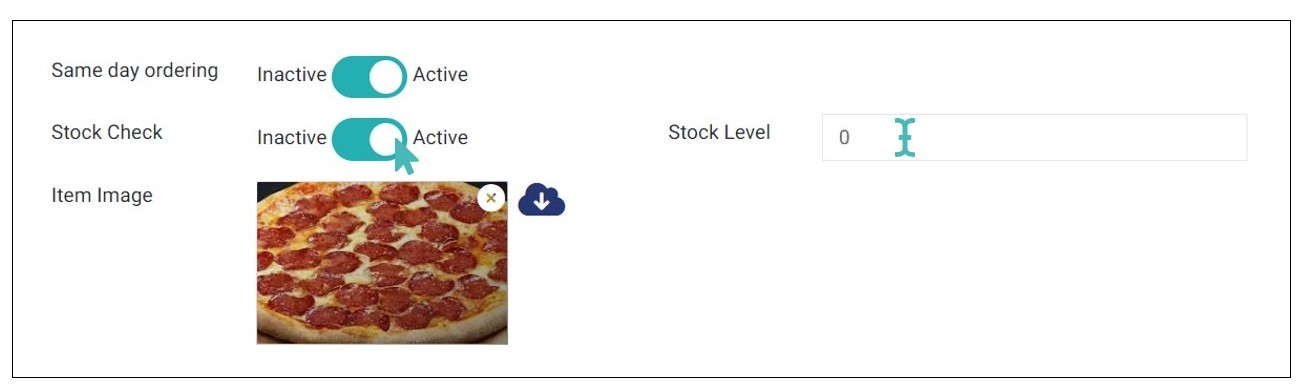
Next, go to the item that is out of stock and toggle the Stock Check button to Active. In the Stock Level input field that is beside the stock check toggle button, fill in a zero (0) to indicate that the product is currently unavailable. Notice that you will need to change this setting with the correct value after restocking.
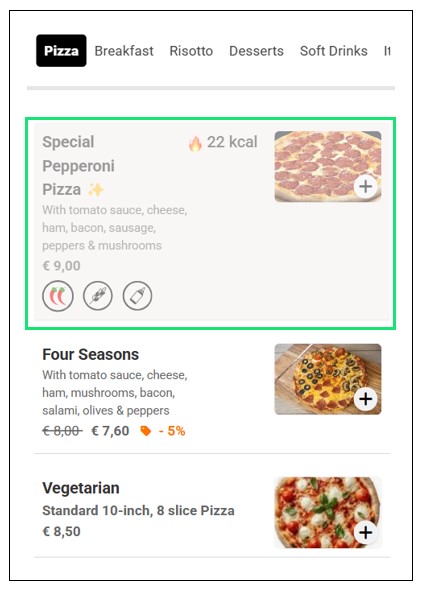
An item whose stock level is zero will be greyed out on the customer menu. Further, customers cannot click, view details or add an item that is out of stock to the shopping cart. Read more on how to set up stock features.
Tip
Only main store products can be associated with stock levels. You cannot set categories, option groups, options, or price variants as being out of stock. Instead, you can use the visibility feature to hide such items from the customer menu.
Hide Store Items via Status Update Settings
Once you have created a store item in your GonnaOrder store, it is set to be visible to customers by default. This means customers can see the product on your menu. But if you are not ready to sell you would need to hide it from the store menu so that you can make the necessary changes.
Marking items as not visible hides them from the customer menu without removing them from the store catalog. And since customers cannot view the product, it implies that they cannot order such items from your store.
Below is a list of store items that you can mark as Visible:
- Categories
- Store products (items)
- Option groups
- Options
- Price variants
To hide an item from the customer menu, click on the name of the category in which that product is placed to expand then click on the small settings icon to the right of the item name.
Clicking on the item status update settings icon displays a popup with four status options. Click on the radio button labeled Hidden and save the changes to your catalog.
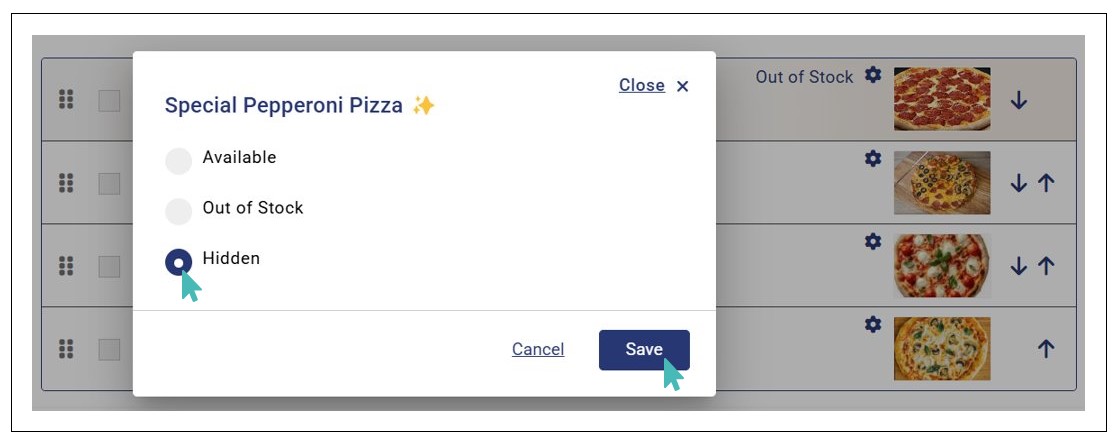
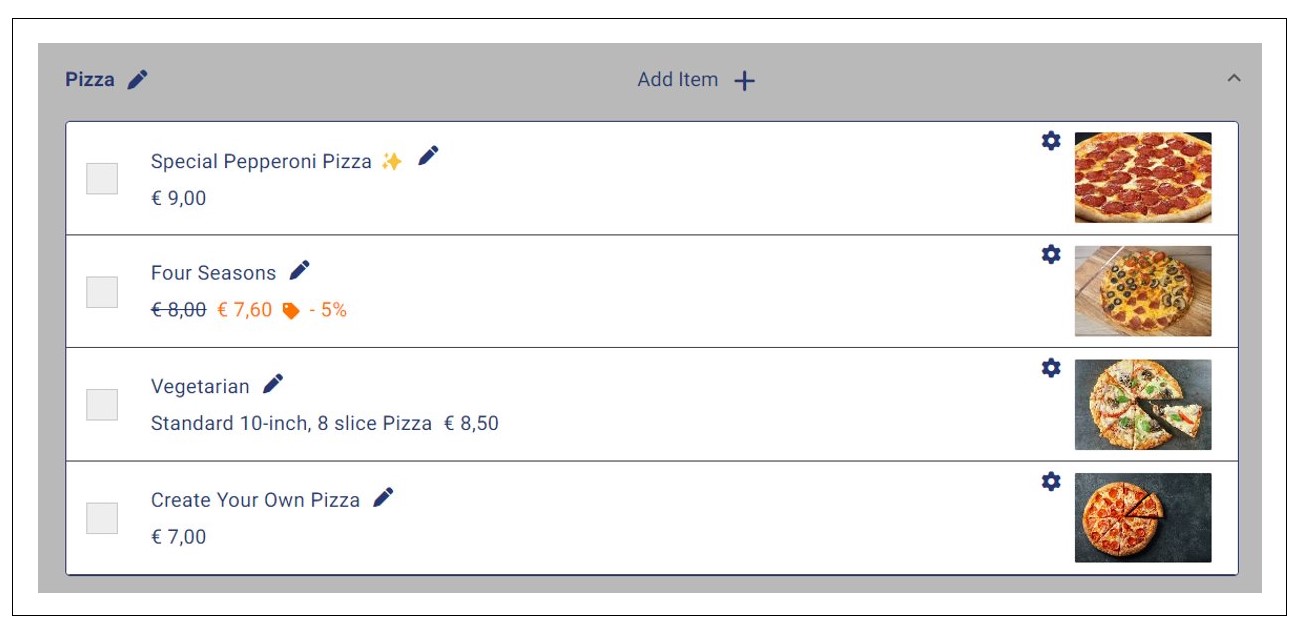
Notice that hidden items are not displayed to the customer.
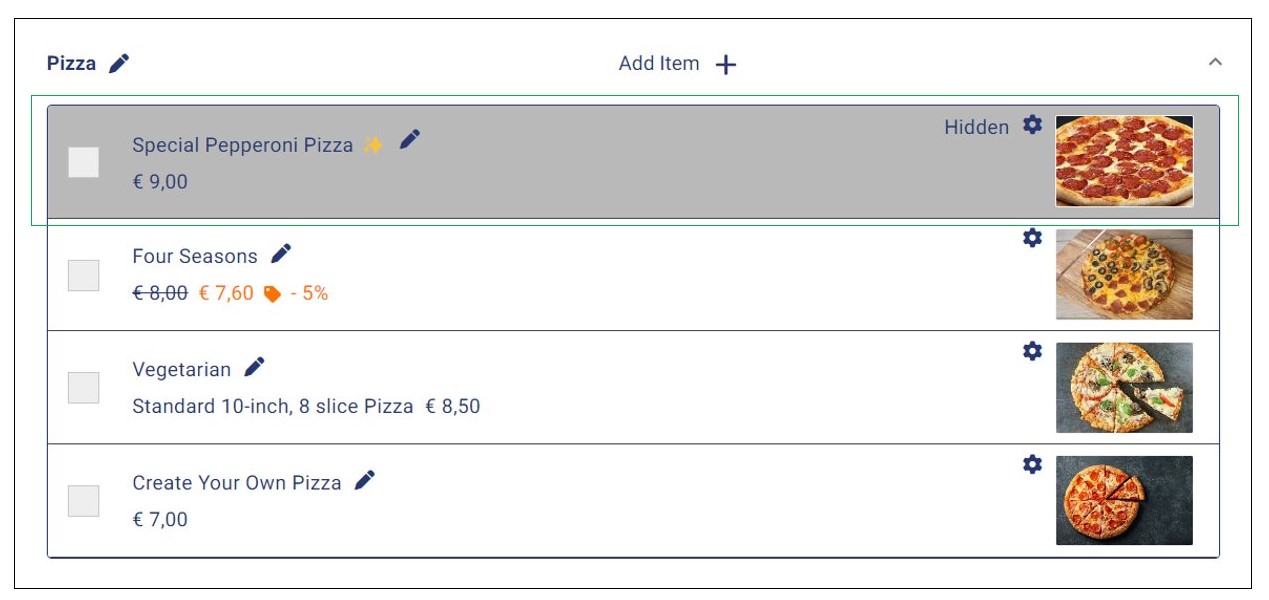
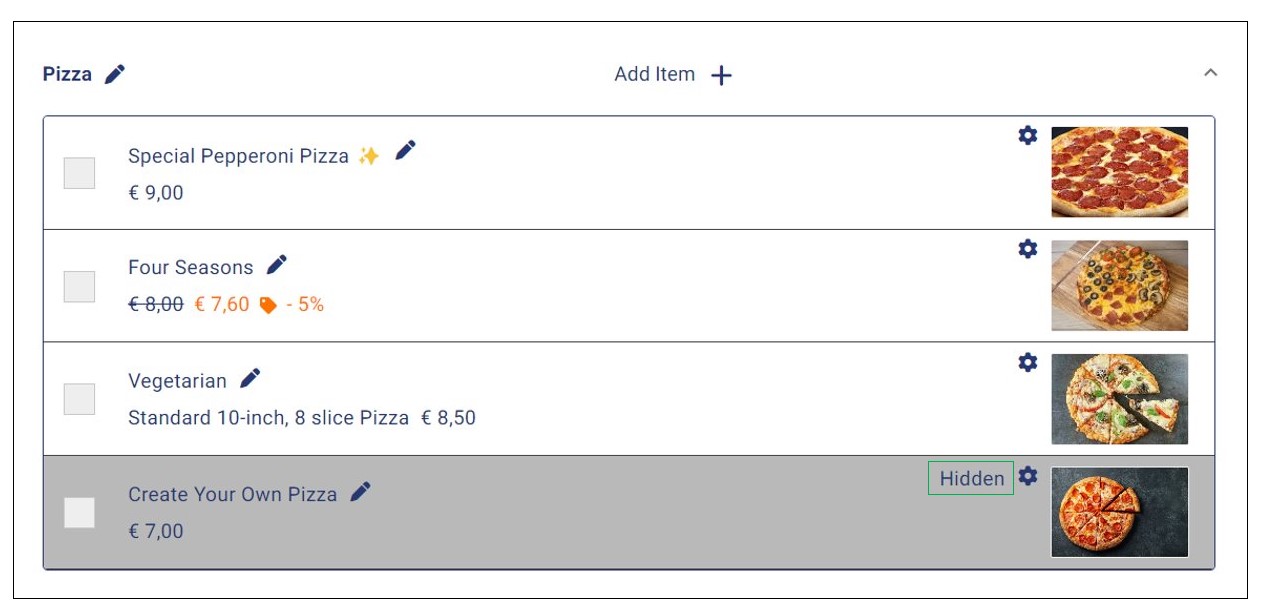
On the store catalog, such items have a tag Hidden on them and are highlighted in grey color. This makes it easy for you to keep watch of the items and update their status as needed.
Hide a Store Item by Updating the Details
The alternative way of hiding a store item from the menu follows the process of editing item details. This method is therefore only appropriate if, besides updating the status of an item, you also need to update other item info such as price or short description.
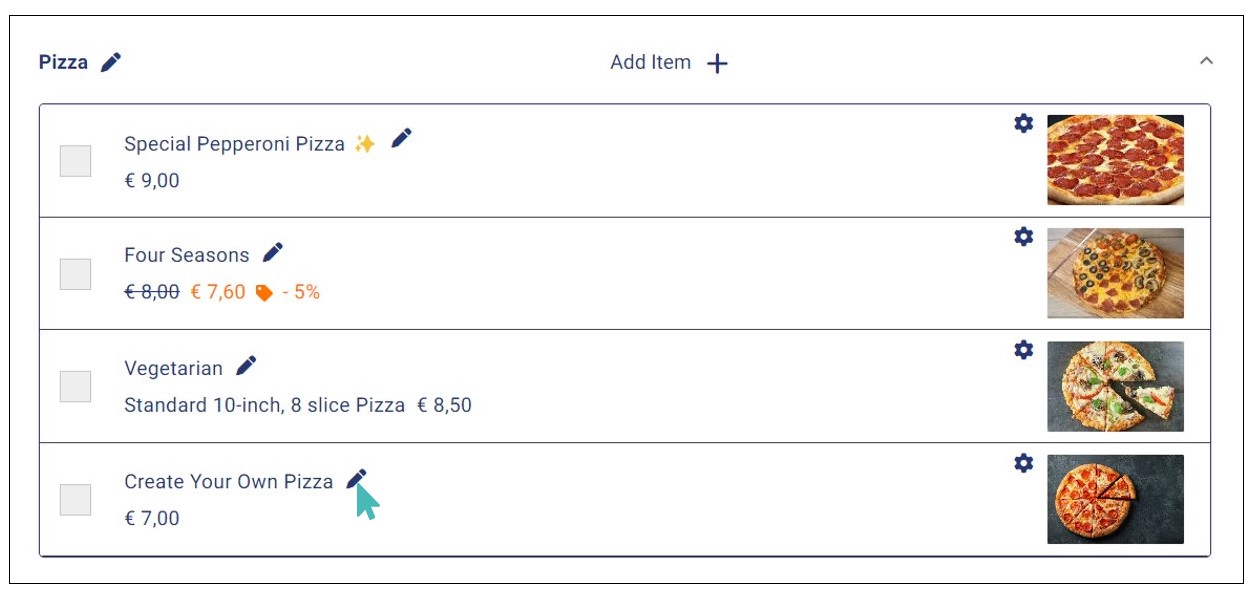
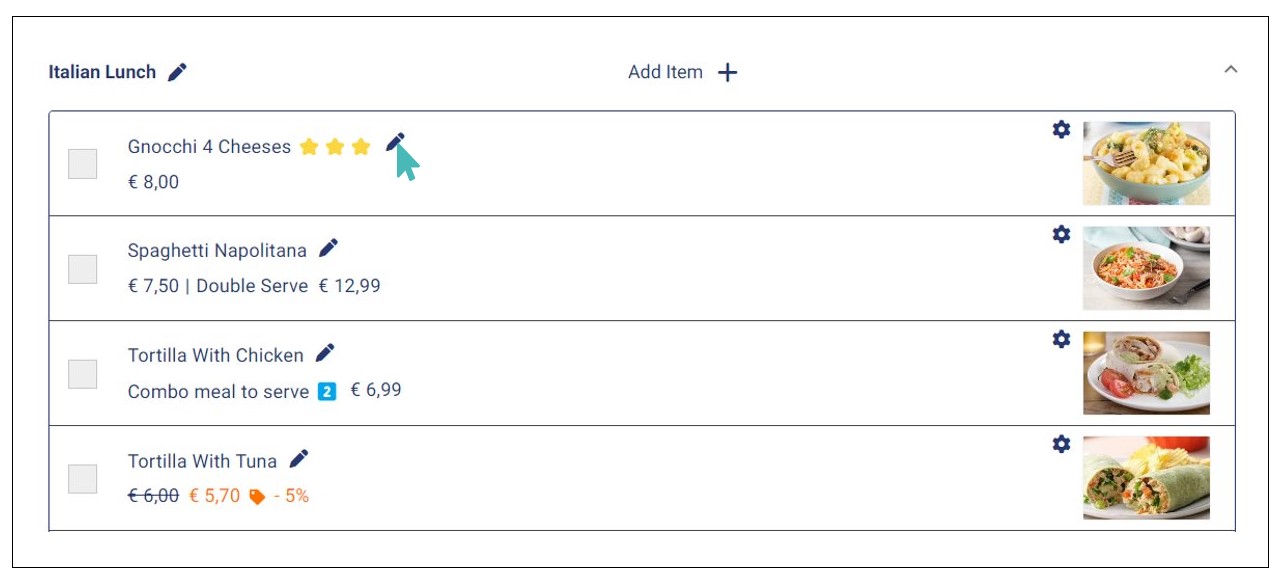
To follow this method, click on the name of the category under which the specific item is listed to show category items. Next, click on the Pencil icon to the right of the item name to bring up the item details.
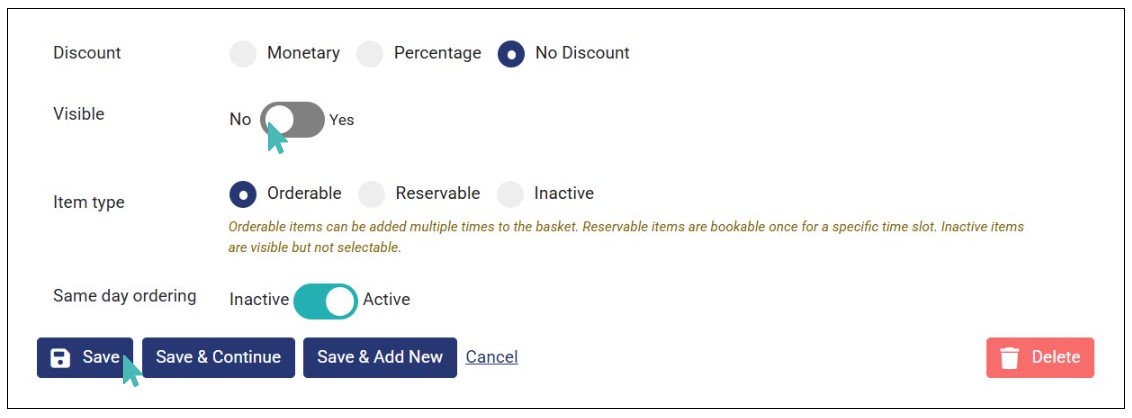
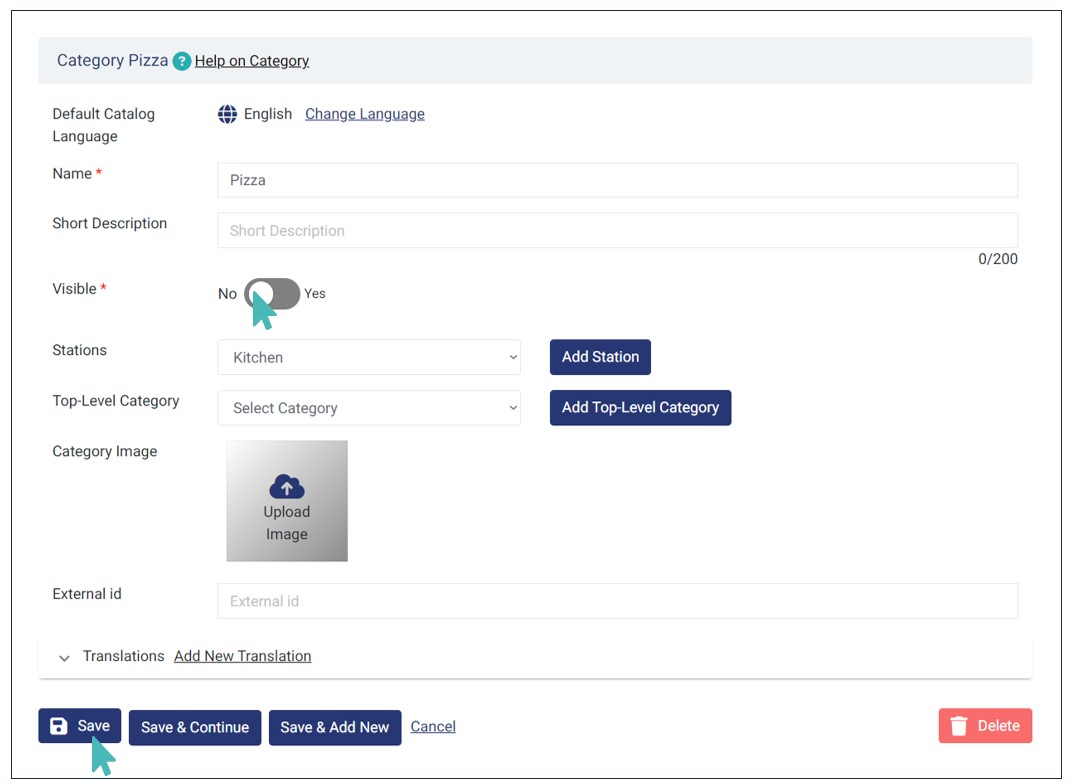
Scroll down to Visible and toggle the button to No. Be careful when changing the visibility of products since hiding the wrong item can have a negative impact on your store sales.
When you save these changes, the product whose details you are editing will no longer appear on the menu. Therefore, you will need to go back and toggle the Visible button to yes to return the item to the customer menu.
Additionally, setting the visibility of an item to No gives it a grey background on the store administration interface. This allows you to easily know items that are in your catalog but not in the customer menu. This applies to both categories and individual store items.
Hiding Categories, Option Groups, and Price Variants
By default, categories, price variants, option groups, and options are set to be visible. If you disable the visibility of a category, it (and all products listed in it) will disappear from the customer menu. The said category will have a grey highlight on the admin interface. The greying out lets you know that you cannot receive orders for items listed under the affected category. It serves as a visual reminder for you and the store staff that some items have been removed from the menu and you can then change the visibility of the category as needed.
Tip
You can set a category’s visibility to no if you need to hide all the associated items, option groups, and price variants from the customer menu. This way, it will be easier for you to return all of them to the menu with a single click.
The visibility of a category, option group, or price variant can only be changed through a details update. This means you have to view the details of the item you would like to update and switch the Visible setting button No.
Set Items as Inactive via Item Details Update
You can mark store items inactive to pause ordering or if the items are added to the catalog for informational purposes only. This stops customers from including them in new orders. When an item is marked inactive, it will still appear in the customer menu, but cannot be added to the shopping basket.
You can set any product in your store as inactive on the item details page. Simply find the item on the category and click the edit icon to open the item details page.
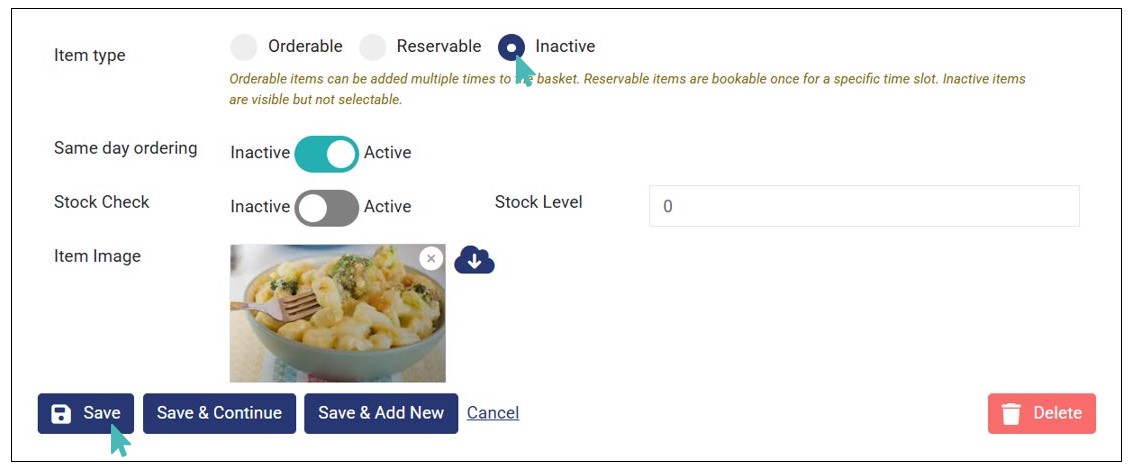
Find the Item type setting and select the Inactive option. Next, click Save for the changes to take effect.
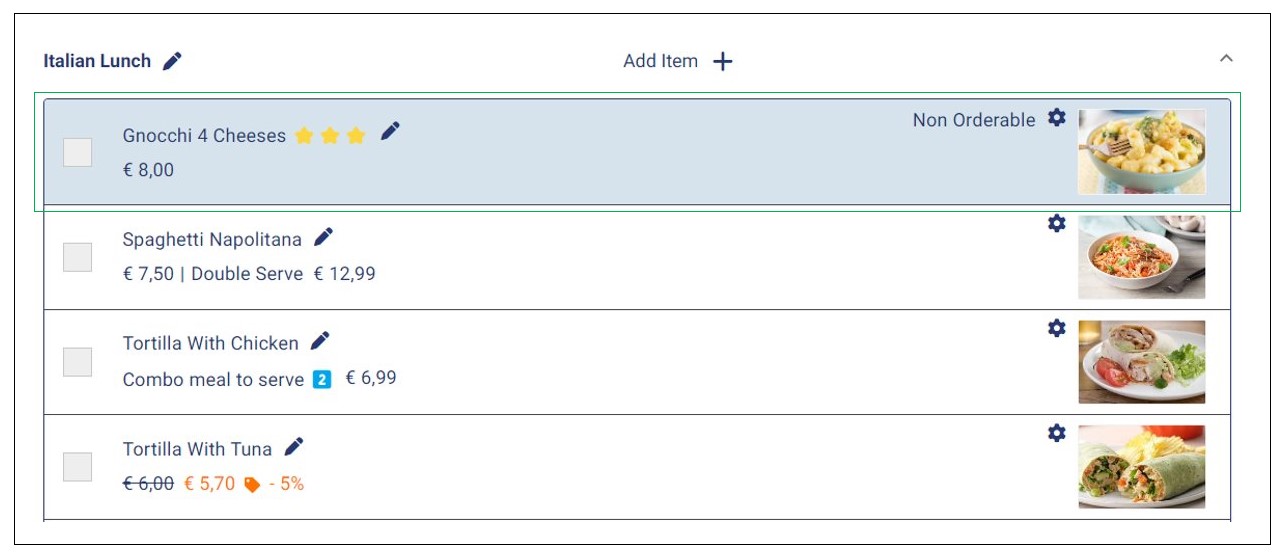
Items set as inactive will have a Non Orderable status and are highlighted in light blue color on the store catalog.
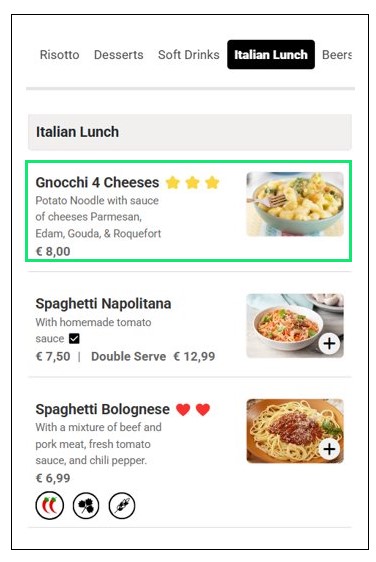
Customers viewing your menu will see both items marked orderable and the inactive ones, but with slight differences. For instance, they cannot click on products marked as inactive and so they cannot place orders for them. Still, they can see the name, short description, and image. On the other hand, your customers can view, click, place orders, and pay for products marked as orderable.
This setting is useful when you are running out of ingredients for an item temporarily.
Tip
- Unlike with the Visible setting, only main store products can be marked as orderable, reservable, or inactive. Hence, you cannot mark categories, option groups, options, and price variants as orderable, reservable, or inactive.
- A customer cannot click on items marked as inactive to expand detail and neither can they add such items to their order.
How Options Appear Under an Inactive Item
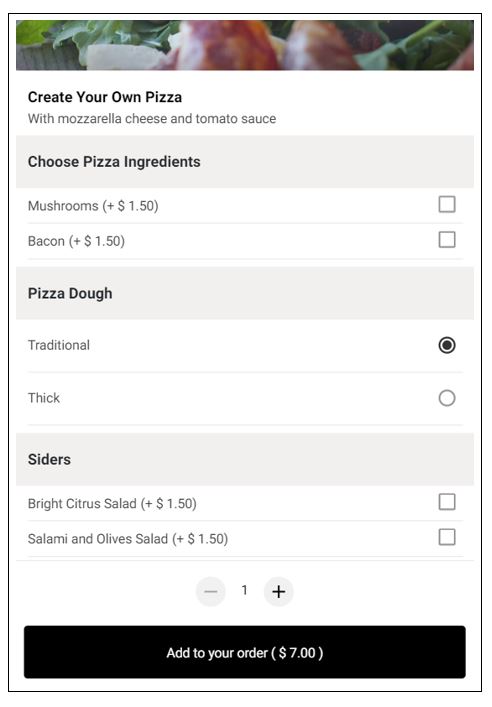
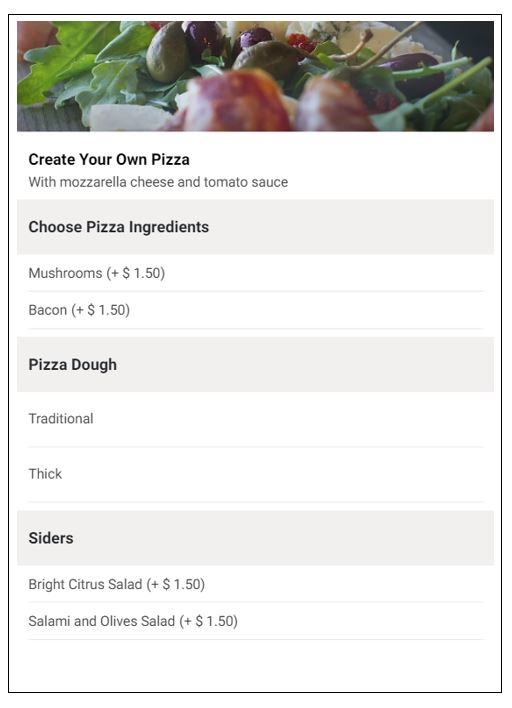
If a main store item is marked as Inactive, but it has one or more option groups in it, then the item will be clickable on the customer menu unlike with other items. However, if the item is so clicked, only the details of the options will be displayed. All selection options such as checkboxes, radio buttons, and count steppers will be hidden.
Tip
The Orderable feature is not equivalent to setting items as out of stock. It can be used to pause ordering for a given store product even when it is in stock while the latter is used with items that are temporarily out of stock.
You can also add informational items and set them as inactive.
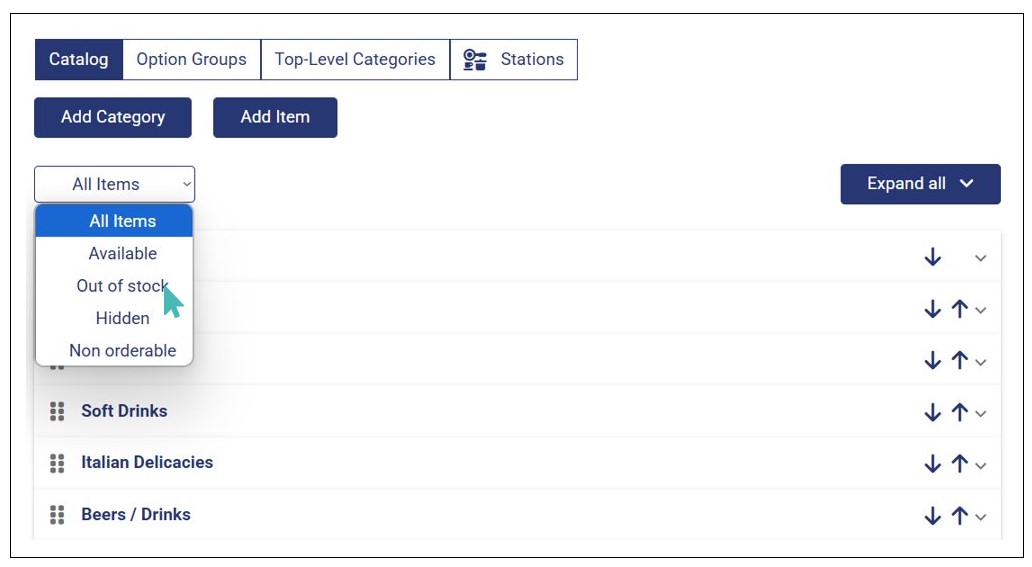
Filter Catalog Items by their Availability Status
GonnaOrder allows you to filter and view catalog items based on their status. This gives you a quick overview of the items under different statuses and take necessary actions as soon as possible. To do so, go to Catalog and click the dropdown above the categories to select the status of the items you would like to view.
When you select the status, the categories with items of the selected status automatically expand and display only items with the chosen status. For example, in the above case, the categories with items that are out of stock expand. You can see all out-of-stock items in your catalog at a glance. This enables you to take appropriate actions, such as restocking or change the individual item status.
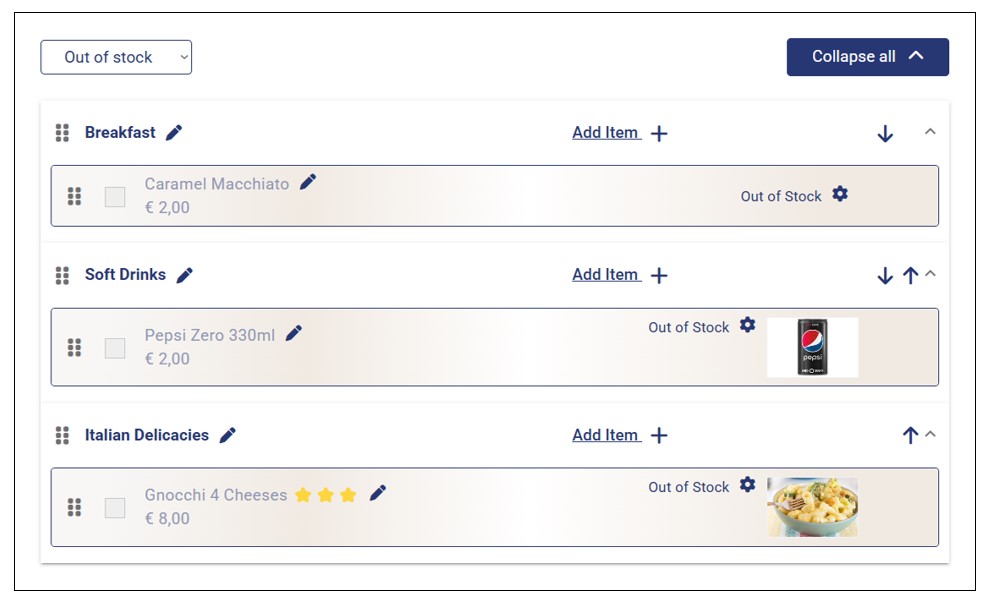
You can use this feature to filter and quickly view all available, non-orderable, and hidden catalog items across different categories.