Categories are a way to group items that a customer can purchase from your store.
Category examples include Starters, Main Course, Ice Cream, and Pizza. A category should have similar items, and its name should be descriptive so that customers quickly know where to find which offers.
Once the categories are added, you can also segregate these categories into different Top Level Categories. For example, Soups, Salads, and Breads can be grouped under Appetizers or Alcholic and Non-Alcoholic drinks can be grouped under Beverages. For more information on how to create top-level categories, refer to the Manage Top-Level Categories.
On This Page
- Add a Category
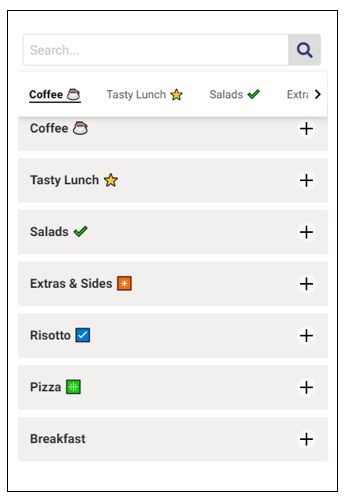
- Highlight Categories With Icons and Emojis
- Preview a Category
- Update a Category
- Delete a Category
Add a Category
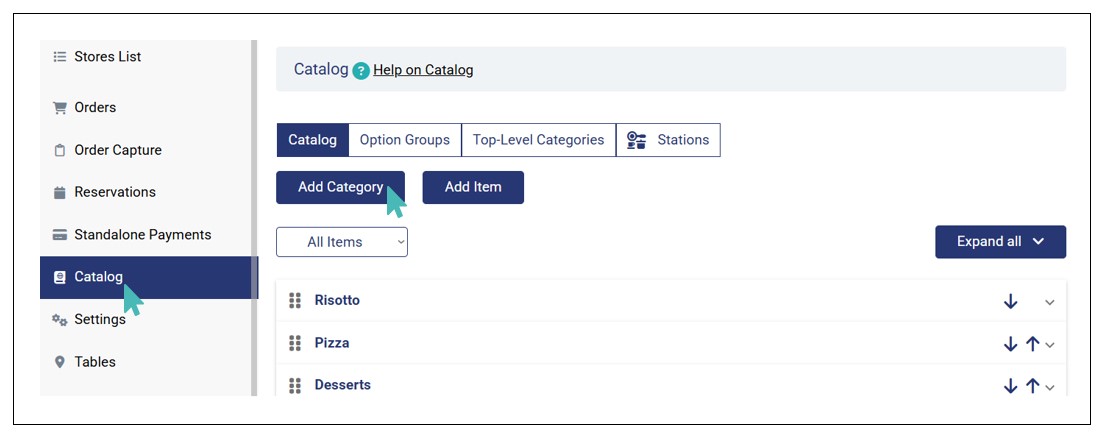
The catalog is accessible by clicking the Catalog on the side menu. To create a new category on the catalog, click on Add Category in the catalog tab.
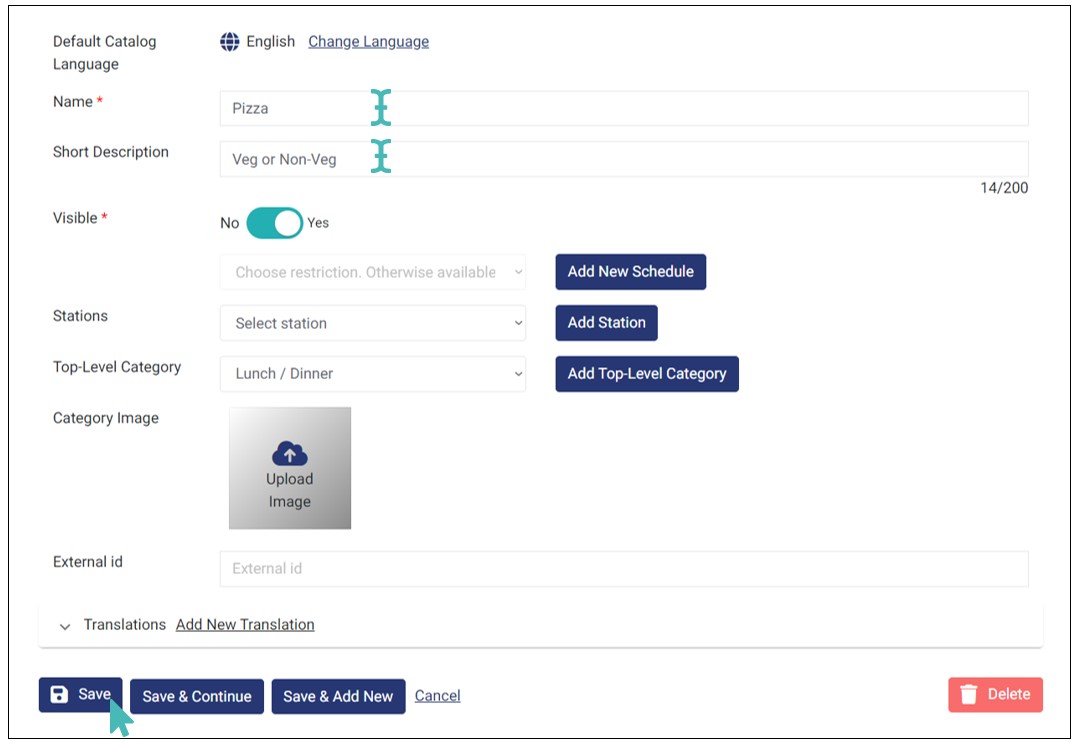
Provide a name and a short description of the category you want to add on the category creation page, change the category settings as needed, and save. The short description of a catalog appears on the top of store products on the customer menu and should therefore be short and easy to understand.
Below are the catalog details and settings explained.
-
- Default Catalog Language: By default, the category will inherit the language of your store, but if you need it in some other languages, please change the language by clicking on the provided link.
- Name: Provide a name for the category. It should be short and easy for your customers to understand. In a case where a category can be referred to with several names, you should choose the one that is widely known or one that customers in your locality would best understand.
- Short Description: Add a short description of this category. It will help your customers understand what products they will find under this category. Note that the short description will appear as the first item in your category, and all products will appear below it. Make it informative. Short Description has a 200 character limit.
- Visible: Use the toggle button to mark this category as visible or not. This directly impacts your sales since hidden categories do not appear in the customer menu. Toggle this button to Yes if you are ready to sell items in this catalog. To learn more about marking items as visible or not visible, see this page.
- Schedule: If your category is available at all times, leave it as Available at all times (default setting). Otherwise, click Add New Schedule or associate the category with existing store schedules. You can learn how to manage store schedules here.
- Stations: If you want to associate a category with an existing station, select the station from the dropdown list. On the other hand, if you want to create a new station for the category, click the Add Station button. However, if you don’t want to associate the category with any station, leave it in the default setting – Select station. For more information about stations, visit the dedicated Manage Stations help page.
- Top-Level Category: If you want to associate a category with an existing top-level category, select the top-level category from the dropdown list. However, if you don’t have existing top-level categories or you want to associate the category with a new top-level category, click Add Top-Level Category. Lastly, if you don’t want to associate the category with any top-level category leave the field on the default setting – Select Category. You can learn more about top-level categories on the Manage Top-Level Categories help page.
- Category Image: Add an image that defines the overall items within a category. This image will be visible to customer at the order stage and can also be viewed at order capture.
- External ID:The External ID field is helpful when you have enabled integrations with external applications, such as, POS via HubRise. It helps GonnaOrder communicate with external applications effectively when customers place orders through GonnaOrder or a connected POS.
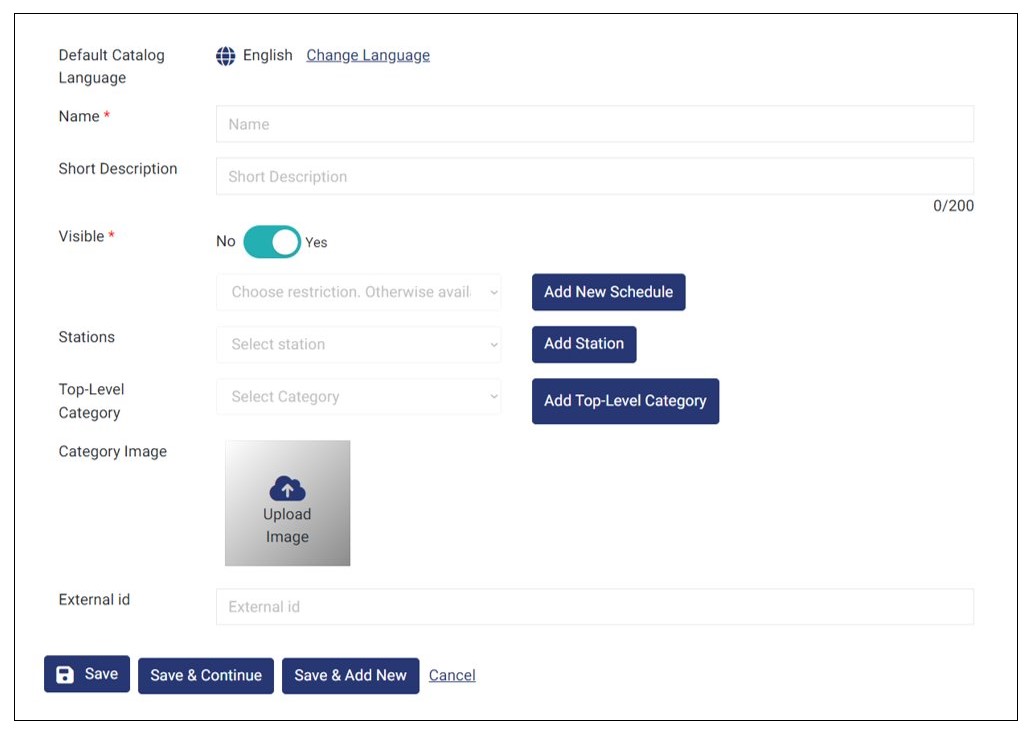
Once you have filled in the details, click any of the three saving options, depending on the next course of action.
Highlight Categories With Icons and Emojis
Icons and emojis can help attract customer attention. You can add icons to both the catalog name and the short description. Please note that not all icons are supported.
You can copy and paste the following examples to your catalog (Only copy the symbol):
| Star: ⭐ | Sparkles: ✨ | Sparkle: ❇️ | Coffee: ☕ | Eight spoked asterisks: ✳️ | Ballot box with check: ☑️ |
| Heavy checkmark: ✔️ | Eight-pointed black star: ✴️ | Heart: ❤️ | One: 1️⃣ | Two: 2️⃣ | Three: 3️⃣ |
| Four: 4️⃣ | Five: 5️⃣ | Six: 6️⃣ | Seven: 7️⃣ | Eight: 8️⃣ | Nine: 9️⃣ |
Preview a Category
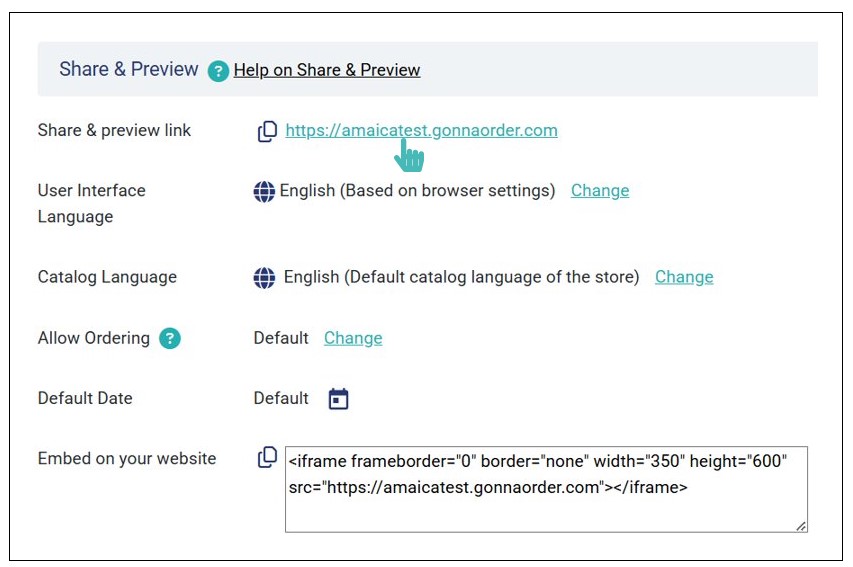
To preview the category you created, click Share & Preview in the sidebar menu.
Then click on Share & Preview Link. The share and preview link will be your (gonnaorder domain) + (.)(gonnaorder.com).

Update a Category
Category information can be updated at any time and as needed. For instance, if you used a name that people find hard to understand, it would be logical to change it to something they would find more familiar.
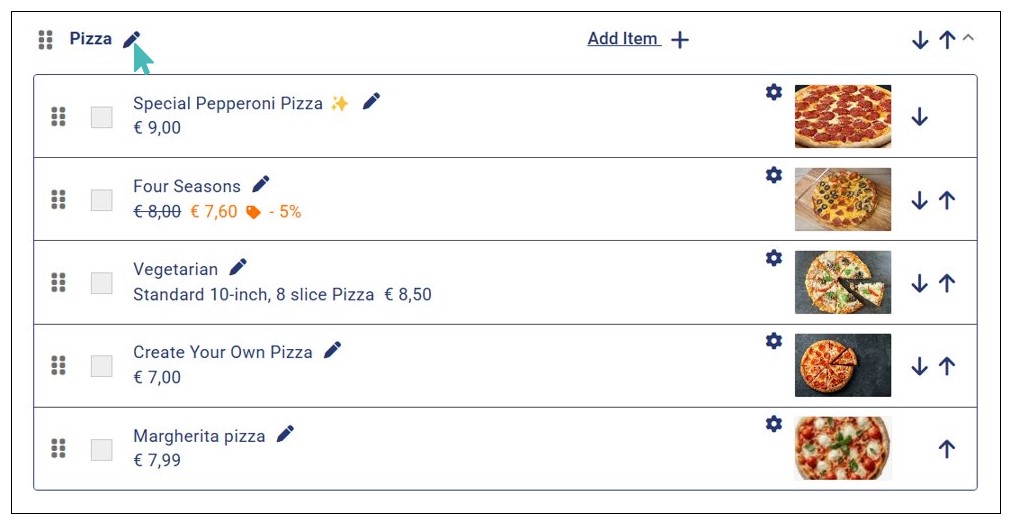
To update a specific category, click on the name of that category and then click the Edit icon.
Change the fields you want to edit, then click Save.
Delete a Category
Like updating a category, GonnaOrder does not restrict when you can remove categories from your store. However, the category being removed must not have listed store products.
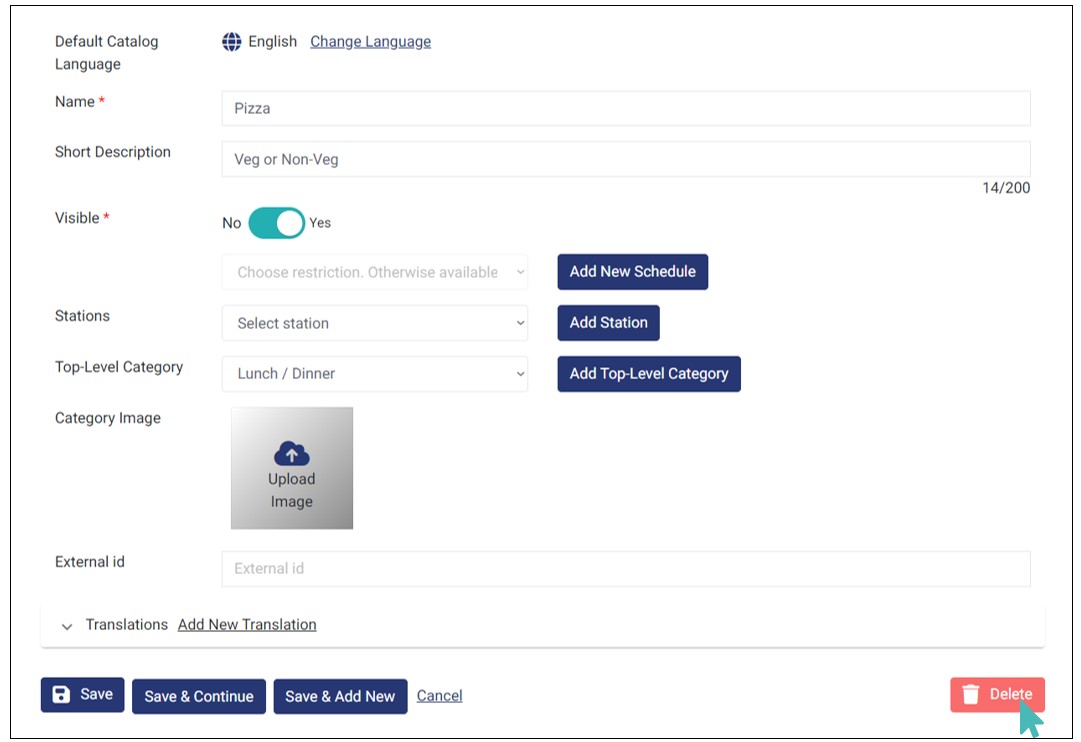
To Delete a specific category, go to the name of that category and click on the Edit icon. See the image in step 1 of the update category section above.
At the bottom right corner, you will see a Delete button. Click on it and confirm deletion on the pop-up that comes up.
Tip
You cannot delete a category that has items. You should first delete all items or associate them with a different category.
